Simulator Developer Guide
This guide will show you how you test and control apps and services on webOS TV Simulator.
App development
This section explains how to control your app on the Simulator.
Launch an app
There are three ways of launching an app.
Select ‘Launch App’ on the menu bar or press ‘App’ on RCU
- Select File>Launch App on the menu bar or click App on the bottom of RCU.
- Select the root directory of the app and click OK. The root directory must be the directory where appinfo.json is located.
Use CLI command ‘ares-launch’
Execute the following command on the terminal.
ares-launch -s VERSION /APP/DIR/PATH// example
ares-launch -s 23 /home/user/myApp- The path can be either relative or absolute.
- VERSION is the version of webOS TV. For example, it would be 23 for webOS TV 23 Simulator.
If there are multiple Simulators installed corresponding to the specified webOS TV version, the latest-version Simulator will be run and launch the app.
Click the app icon on the main screen or select the app on the app list
Once an app is launched, its icon is added to the main screen and on the app list. Clicking the app icon on the main screen or selecting the app on the app list window will launch the app.
Debug the app
The Web Inspector is launched automatically when the app is run, so you can debug the app with it.
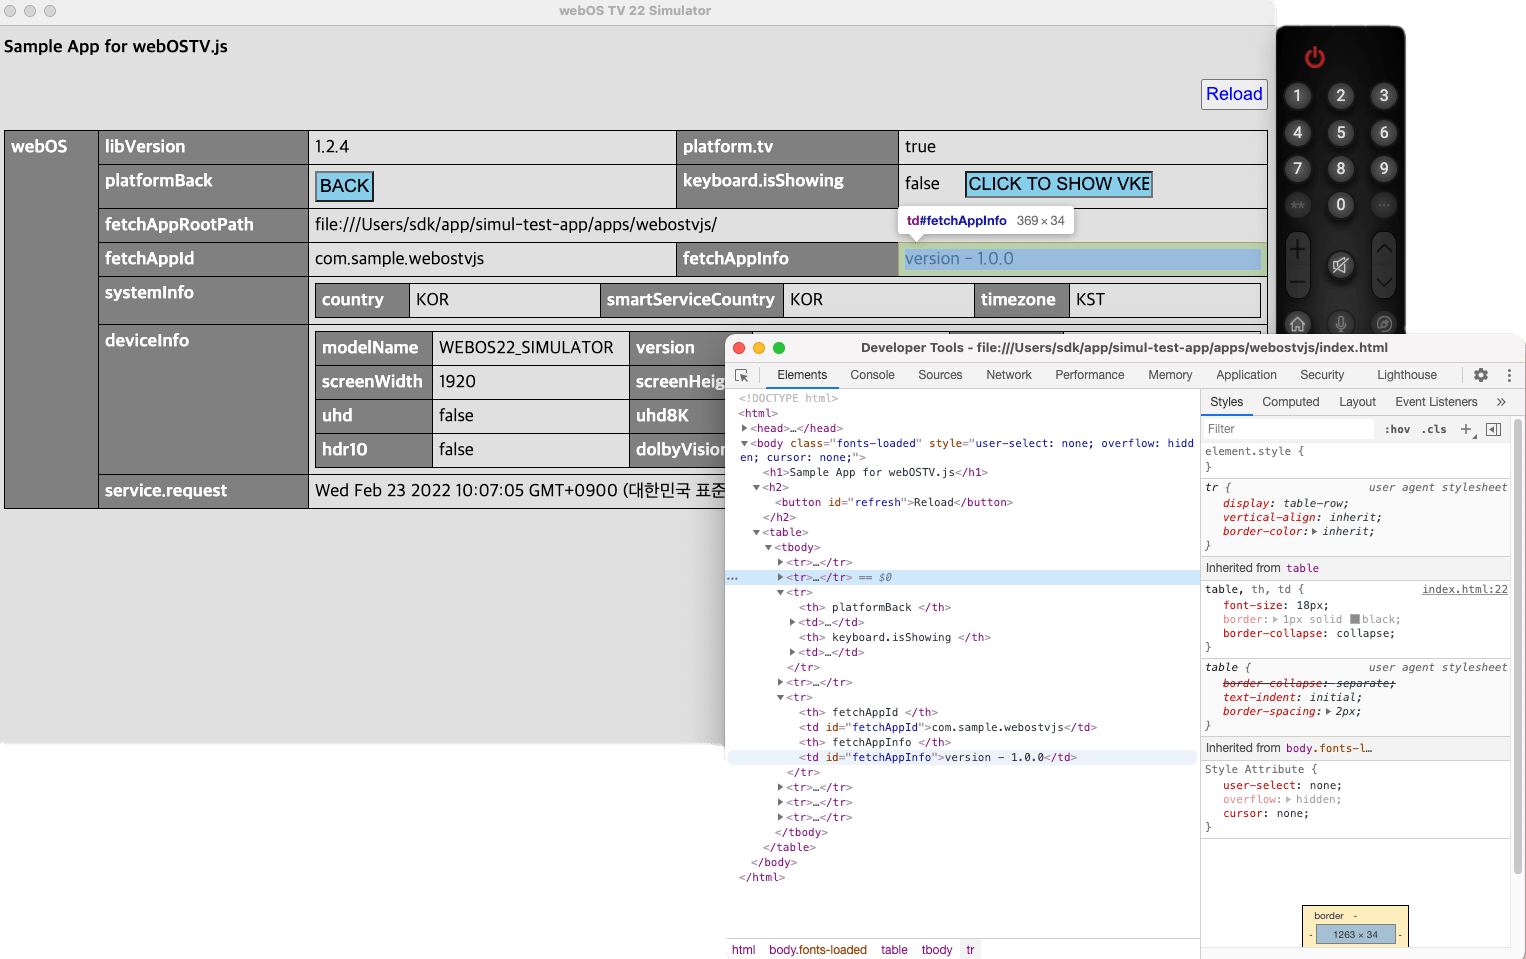
Auto-reload
As soon as you modify and save the code, your app is automatically reloaded, so you can check the result of the modification you made immediately.
Close the app
You can close an app by either:
- Selecting File>Close App on the menu bar, or
- Clicking Close on the bottom of RCU
Remove an app
To remove an app from the main screen and app list, right-click the app to remove on the main screen or app list and select Remove.
Service development
This section explains how to control your service on the Simulator.
Add a service
The directory of the service to add should be located under the user's home directory.
You can add a JS Service on the Simulator.
- Select File>Add Service on the menu bar or click Service on the bottom of RCU.
- Select the root directory of the service to add and click OK. The root directory must be the directory where package.json is located.
- Check if the service is successfully added on the JS Service window.
Start or stop the service
You can start or stop the added service.
- Select Tools>Service List on the menu bar.
- Click the service to start or stop on the JS Service window.
Remove a service
You can remove a service.
- Select Tools>Service List on the menu bar.
- Right-click the service to remove on the JS Service window and select Remove.
RCU
This section shows the layout of RCU and explains the function of its buttons.
RCU layout

Buttons
Numbers, colors, directions, OK, back, and media keys
These buttons use the same key code of buttons on a real RCU device. Apps can handle these key events.
Home
If this Home button is clicked while an app is running, the screen switches back to the main screen. At the time, the app stays hidden, not terminated, in the background.
Functional buttons
Functional buttons on the bottom do not exist on a real RCU device. These are only on the Simulator for development convenience.
- App: Launching an app (same as File > Launch App on the menu bar)
- Service: Adding a service (same as File > Add Service on the menu bar)
- Inspector: Turning on or off the Inspector for the app
- Close: Closing an app (same as File > Close App on the menu bar)
- Touch: Turning on or off the touch mode (same as Action > Touch Mode on the menu bar)
- Portrait: Turning on or off the portrait mode (same as Action > Orientation > landscape/portrait on the menu bar)
Touch mode
This section shows how to turn on the touch mode and which touch gestures are supported.
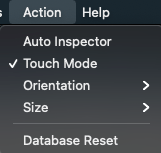
Turn on the touch mode
You can turn on the touch mode on the menu bar or using the special key on the bottom of RCU.
-
On the menu bar, select Action>Touch Mode.
-
On the bottom of RCU, click Touch.

Supported touch gestures
If the touch mode is enabled, a click with the mouse acts as a touch on the screen.
Basic gestures
Upon a click with the mouse, a different event, depending on the value of supportTouchMode in appinfo.json, is delivered to the app.
A short touch is also available (A touch held for about 200ms or shorter is considered a short touch).
For more details, see Touch Screen.
Swipe
A swipe from the edge of the window triggers a specific action as if a swipe on the device.
A swipe down from the top does not trigger any action.
Touch remote
Touch remote is also available.

Portrait mode
This section shows how to turn on the portrait mode and explains how it works.
Turn on the portrait mode
You can turn on the portrait mode on the menu bar or using the special key on the bottom of RCU.
- On the menu bar, select Action>Orientation>portrait.

- On the bottom of the RCU, click portrait.

You cannot select reversed_landscape and reversed_portrait on the RCU. Go to the menu bar to use those modes.
How it works
When the portrait mode is turned on,
webOSSystem.screenOrientationis changed, and- A
screenOrientationChangeevent occurs.
Even if the orientation is changed to portrait, the orientation of the Simulator itself does not change.
If an app requests change of orientation using webOSSystem.setWindowOrientation, the orientation of the actual app layout changes.
For more details about the portrait mode, see Portrait Mode.
Screen Saver
This section explains how to turn on Screen Saver and change its timeout delay.
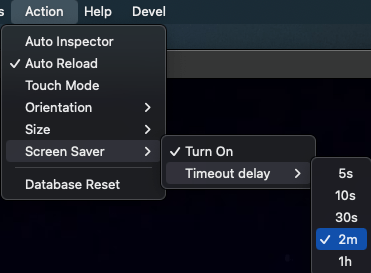
Turn on Screen Saver
You can turn Screen Saver on the menu bar. Note that this turning-on is the activation of the Screen Saver function and does not mean immediate display of the Screen Saver image.
- On the menu bar, select Action > Screen Saver > Turn On.

Change the timeout delay
You can set the wait time to 5s, 10s, 30s, 2m, or 1h. The default value is 2m.
- On the menu bar, select Action > Screen Saver > Timeout delay and choose the value.