CLI Developer Guide
This guide will take you through the app development process for webOS TV with CLI from creation to debugging. The process comprises creation, packaging, installation, launching, and debugging of an app, and if you are to use webOS TV Simulator, packaging and installation will not be necessary.
Create a web app
The first step is creating a web app using the ares-generate command from a template. There are two web app templates available.
- Basic web app template: A template of a basic web app that displays the “Hello World” message on a screen
- Hosted web app template: A template of a hosted web app
The webOS CLI further provides templates for JS services, config files, etc. For the list of all available templates, see App Templates, or use the following command.
ares-generate --listCreate a basic web app
The basic template provides a “Hello World” web app with the minimum essential files. This template is useful if you are to use other UI frameworks.
Execute the following command to create a basic web app into the./sampleApp directory.
ares-generate -t basic ./sampleAppThe following table lists the files of a web app that the template provides:
| Directory / File | Description |
|---|---|
| webOSTVjs-x.x.x | The webOS TV library directory. The webOS TV-specific library to call LS API. See webOSTV.js for the detailed description of the webOS TV library. |
| appinfo.json | The web app configuration file. The appinfo.json file includes metadata of the web app. This file must exist when packaging the web app. See appinfo.json for the detailed description of the appinfo.json file. |
| icon.png | The icon image file. See App Resources for the detailed description of the icon.png file. |
| largeicon.png | The large icon image file. See App Resources for the detailed description of the largeicon.png file. |
| index.html | The web app's main page. This page only shows "Hello World" text on a screen. |
Create a hosted web app
The hosted_webapp template provides a hosted web app that contains a redirect URL with the minimum essential files.
Execute the following command to create a hosted web app into the ./sampleApp directory.
ares-generate -t hosted_webapp ./sampleAppThe following table lists the files of a hosted web app that the template provides:
| Directory / File | Description |
|---|---|
| appinfo.json | The web app configuration file. The appinfo.json file includes metadata of the web app. This file must exist when packaging a web app. See appinfo.json for the detailed description of the appinfo.json file. |
| icon.png | The icon image file. See App Resources for the detailed description of the icon.png file. |
| largeicon.png | The large icon image file. See App Resources for the detailed description of the largeicon.png file. |
| index.html | The web app's main page that contains the redirect URL. |
Create a JS service
The js_service template provides a sample JS service running as a background service on webOS TV. The sample JS service responds to simple messages for a service request.
Execute the following command to create a JS service from the template to the ./sampleService directory.
ares-generate -t js_service ./sampleServiceThe following table lists the files of the sample JS service with the description:
| File | Description |
|---|---|
| helloworld_service.js | The sample JS service code that provides several simple commands. These commands are specified in the services.json file to use them. |
| package.json | The configuration file of NPM. For more information, refer to https://docs.npmjs.com/getting-started/using-a-package.json. |
| services.json | The configuration file defines what commands the service provides on the webOS bus. For more information, see services.json. |
Create an appinfo.json file from template
The webappinfo template provides anappinfo.json file with sample values. If you are building a new web app without a template or using the existing web app which was not made from a template, you should add the appinfo.json file into your app. This file holds the app’s name, ID, app type, icon image, and the main page information.
Execute the following command to create an appinfo.json file from the template into the sampleApp directory.
ares-generate -t webappinfo ./sampleAppThe following is the sample appinfo.json file created from the template.
{
  "id": "com.domain.app",
  "version": "0.0.1",
  "vendor": "My Company",
  "type": "web",
  "main": "index.html",
  "title": "new app",
  "icon": "icon.png",
  "largeIcon": "largeIcon.png"
}
Deploy the web app on a TV device
This section describes how to package the web app and install it on a webOS TV device. You will be using ares-package, ares-install, and ares-setup-device to deploy web apps.
If you are using webOS TV Simulator, skip this step and move to Launch the web app.
Package the web app
The first step is to create a package file (.ipk) of your app using the ares-package command.
Before executing the packaging command, you need to check if the essential files exist. The ares-package command finds and reads the appinfo.json file, where required fields, such as main and icon, are defined, from the app directory. For the same reason, the icon image file and main page file also must exist in the correct path.
Package the web app only
Execute the following command to package the app in the ./sampleApp directory.
ares-package ./sampleAppPackage the web app with JavaScript service
Execute the following command to package the app in the sampleApp directory together with the service in the sampleService directory.
ares-package ./sampleApp ./sampleServiceFor example:
- App ID: “com.yourdomain.app”
- Service ID: “com.yourdomain.app.myservice”
Now you can see that the package file exists in the directory from which you execute the command.
Install the web app
Install the created package file on your device using theares-install command. You can also see the list of target devices using the ares-install command. Use theares-setup-device command to modify the settings of a device.
List target devices
Use the ares-setup-device command to check the name, platform type, description, and SSH access address of target devices.
Execute the following command to see the list of target devices.
ares-setup-device --listThe following is the sample result of the command. The emulator is included in the default device list.
name        deviceinfo                 connection    profile
---------   ------------------------   ------------  --------
emulator    developer@127.0.0.1:6622   ssh           tv
tv          prisoner@10.123.45.67      ssh           tv
With the ares-setup-device command, you can check the list with more details with -F, --listfulloptions. The following shows the command and the sample result.
ares-setup-device --listfull
[
  {
    "profile": "tv",
    "name": "tv",
    "deviceinfo": {
        "ip": "10.123.45.67",
        "port": "9922",
        "user": "prisoner"
    },
    "connection": [
        "ssh"
    ],
    "details": {
        "platform": "starfish",
        "privatekey": "tv_webos",
        "passphrase": "ares-setup-device --full",
        "description": "new device"
    }
  },
  {
    "profile": "tv",
    "name": "emulator",
    "deviceinfo": {
        "ip": "127.0.0.1",
        "port": "6622",
        "user": "developer"
    },
    "connection": [
    "ssh"
    ],
    "details": {
        "platform": "starfish",
        "privatekey": "webos_emul",
        "description": "LG webOS TV Emulator"
    }
  }
]
Modify the settings of a target device
The default loopback address needs to be changed to the remote host address if you are using the emulator on the remote computer for testing. The following example describes how to set the host address of the emulator to the target device.
ares-setup-device --modify emulator --info "host=10.177.231.137"
Re-check the device list to confirm if the host address of the target device has been modified as shown in the following example.
ares-setup-device --list

name     deviceinfo                     connection  profile
-------- -----------------------------  ----------  -------
tv       prisoner@10.123.45.67          ssh         tv
emulator developer@10.177.231.137:6622  ssh         tv
There is another way to change the target device’s information with the interactive mode of the ares-setup-device command. The following example shows how to change the target device’s host address in the interactive mode. Run the ares-setup-device command with no option, and it will show the list of target devices and start the interactive mode as below.
ares-setup-device

name     deviceinfo                connection  profile
-------- ------------------------  ----------  --------
tv       prisoner@10.123.45.67     ssh         tv
emulator developer@127.0.0.1:6622  ssh         tv

** You can modify the device info in the above list, or add new device.
? Select
> add
  modify
  remove
If you do not want to change the previous value, press the enter key without any value. For more information about the command usage, see ares-setup-device.
Install the package file of your web app
Make sure that your target device is running. Execute the following command with the name of the target device and package file as parameters to to install the package file on the target device.
ares-install --device myTV ./com.domain.app_0.0.1_all.ipkIf the installation is successful, you will see a success message.
To verify the installation, execute the following command to see the list of installed app IDs and check that your app ID exists in the result.
ares-install --device myTV --listRemove a web app
Use the ares-install command with the--remove option to remove an app from the device. You need to enter the app ID to remove as a parameter. Execute the following command to remove your app from the target device.
ares-install --device myTV --remove com.domain.appRun the web app
Use the ares-launch command to launch or close your web app.
Launch the web app
Execute the ares-launch command with the device name and app ID as parameters to launch the app on the target device.
ares-launch --device myTV com.domain.appAfter executing the command, check if your app started on the target device.
Close the web app
Execute the ares-launch command with the--close option, in addition to the name of the target device and the app ID used to launch the app, to close the app on the target device.
ares-launch --device myTV --close com.domain.appDebug the web app
You can monitor the execution information of web apps or JS services running on the target device with Web Inspector and Node Inspector, and to do so, you need to create a package file (.ipk) without minifying. This section describes how to create a package file and execute Web Inspector and Node Inspector for debugging purposes.
Package the web app without minifying
When creating a package file (.ipk), the ares-packagecommand reduces and merges the source code and adjusts and shrinks variable names and line spacing, which is called minifying. Minifying makes debugging difficult.
Therefore, for debugging purposes, use the --no-minifyoption of the ares-package command to omit the minifying task.
ares-package --no-minify ./sampleAppLaunch Inspectors
The webOS TV provides Web Inspector and Node Inspector for debugging of web apps and JS services, respectively.
Launch Web Inspector
For debugging of web apps, the ares-inspect command provides Web Inspector that displays the execution information of apps.
Execute the following command while the app is running:
ares-inspect --device myTV --app com.domain.app --openWith the --open option, Web Inspector opens on the default browser of your PC. Note that Web Inspector and Node Inspector work properly on Chromium-based browsers.
To use the Inspectors, the proper version of Chromium, compatible with the webOS TV version, should be installed on your PC. The following table lists the compatible Chromium version by webOS TV version and their download links.
| webOS TV version | Release year of webOS TV | Supported Chrome versions for using Inspector |
|---|---|---|
| webOS TV 24 | 2024 |
|
| webOS TV 23 | 2023 | |
| webOS TV 22 | 2022 | |
| webOS TV 6.0 | 2021 | |
| webOS TV 5.0 | 2020 | |
| webOS TV 4.x | 2018-2019 | |
| webOS TV 3.x | 2016-2017 | |
| webOS TV 2.0 | 2015 | |
| webOS TV 1.0 | 2014 |
You will see Web Inspector as in the below image.
Launch Node Inspector
For debugging of JS services, the ares-inspect command also provides Node Inspector that displays the execution information of JS services.
Execute the following command while the JS service is working:
ares-inspect --device myTV --service com.domain.app.myservice --openYou will see Node Inspector as in the below image:

For more information about Node Inspector, refer to the GitHub of Node Inspector.
Test the web app
This section describes how to test your web app on the TV device or the Simulator with CLI. About debugging of a web app on webOS Studio, see Debug the app on webOS Studio.
Test without installation
You can test code changes to your web app without packaging, installing, and running the app on a TV device.
The --hosted(-H) option of theares-launch command allows you to test the code changes easily on the TV device. If the --hosted option is used with the app directory, an app with idcom.sdk.ares.hostedapp is launched on the device and it opens the files in the directory. From CLI v1.12.0, the auto-reloading function is added, so as soon as you make and save modification to your app files, the app on the TV device is automatically reloaded.
Example
The following is an example of testing a sample app after creating it using CLI without steps for packaging and installation.
# Generate the sample app for test
$ ares-generate ./sampleApp
? app id com.domain.app
? title new app
? version 0.0.1
Generating basic in ./sampleApp
Success
# Test the sample app on the target device (name: myTV) without packaging and installation
$ ares-launch -H ./sampleApp -d myTV
Installing package
./sampleApp/com.domain.app.ipk
Ares Hosted App is now running...- To terminate, enter Ctrl + C.
How to ignore specific files from auto-reloading
To exclude certain files with specific extensions or under specific directories from auto-reloading, create a .reloadignore file. This .reloadignore file should be located in the root directory of the app to test, and the file itself will be excluded from packaging of the app.
Add the absolute or relative path of the files or directories to exclude from auto-reloading into the .reloadignore file. Each item will be distinguished by a line feed, and the relative path of items (except for cases starting with **) will be converted into an absolute path based on the root directory of the app before being applied.
Even if you modify the .reloadignore file while auto-reloading is on, the modification will apply immediately without needing to terminate and re-run the command.
The following is an example of a .reloadignore file.
appinfo.json
tests
**/tmp
**/*.png- appinfo.json - The appinfo.json file in the root directory will be ignored.
- tests - Directories and files under the tests directory in the root directory will be ignored.
- **/tmp - Any tmp directories and files in the app’s working directory will be ignored.
- **/*.png - Any files with the .png extension in the app’s working directory will be ignored.
With this option, however, you cannot test apps that include JS services.
Test on the Simulator
The ares-launch command with the--simulator and --simulator-path option runs webOS TV Simulator to test an app.
With the command, the execution file of webOS TV Simulator of the specified version, by the --simulator option, in the specified path, by the --simulator-path option, is run, and your app will be launched on that Simulator.
For how to install and use Simulator, see Simulator Installation and Simulator Developer Guide.
The following is an example of running the app in the sampleApp directory on the webOS TV 23 Simulator in the specified path.
ares-launch -s 23 -sp /home/webOS_TV_23_Simulator_1.3.0 sampleAppTest on a local server
The ares-server command runs a web server for testing a local file. The web server will run on the given path.
Execute the command to start a web server on your app source directory.
ares-server ./sampleAppYou can open your app with the given URL.
Local server running on http://localhost:7496If you want to open with the default browser of your PC directly, use--open option as below:
ares-server ./sampleApp --openMonitor the resource usage
The function for monitoring the usage of CPU and memory, which has been provided in Beanviser, is added in CLI from v1.12.0.
Using the ares-device command with the--resource-monitor (-r) option, you can monitor the usage of CPU and memory at system or process level. You can also set the time interval to get the usage data periodically and save the data in a .csv file.
For details about each option and parameter, see ares-device.
Monitor at system level
This example displays the system-level CPU and memory usage.
# Display resource usage
$ ares-device -d myTV -r

2022-02-17 08:46:13

(%)   overall  usermode  kernelmode  others
----  -------  --------  ----------  ------
cpu   2.41     0         1.38        1.03
cpu0  1.05     0         1.05        0
cpu1  1.03     0         1.03        0
cpu2  4.12     0         1.03        3.09

(KB)    total    used    free    shared  buff/cache  available
------  -------  ------  ------  ------  ----------  ---------
memory  1023356  245668  458604  1552    319084      727128
swap    0        0       0

=================================================================


# Display resource usage every one second and save them to the resource.csv file
$ ares-device -d myTV -r -s resource.csv -t 1

Create resource.csv to D:webOS_TV_SDK\CLI\bin
2022-02-17 08:47:02

(%)   overall  usermode  kernelmode  others
----  -------  --------  ----------  ------
cpu   1.37     0         1.37        0
cpu0  1.02     0         1.02        0
cpu1  1.03     0         1.03        0
cpu2  2.04     0         2.04        0

(KB)    total    used    free    shared  buff/cache  available
------  -------  ------  ------  ------  ----------  ---------
memory  1023356  245576  458688  1552    319092      727220
swap    0        0       0

=================================================================
2022-02-17 08:47:03

(%)   overall  usermode  kernelmode  others
----  -------  --------  ----------  ------
cpu   1.02     0         1.02        0
cpu0  3        1         2           0
cpu1  0        0         0           0
cpu2  2.04     0         1.02        1.02

(KB)    total    used    free    shared  buff/cache  available
------  -------  ------  ------  ------  ----------  ---------
memory  1023356  245684  458580  1552    319092      727112
swap    0        0       0

=================================================================
To terminate the periodic monitoring of resource usage, enterCtrl + C.
Monitor at process level
This example displays the process-level CPU and memory usage.
# Launch your app before test
$ ares-launch -d myTV com.domain.app
Launched application com.domain.app

# Display resource usage of running apps and services
$ ares-device -d myTV -r -l

2022-02-17 08:51:51

PID   ID                 CPU(%)  MEMORY(%)  MEMORY(KB)
----  -----------------  ------  ---------  ----------
2336  com.domain.app     0.34    8.01       76060
2439  test               0       8.21       77924

======================================================================

# Display resource usage of specified running app
$ ares-device -d myTV -r -id com.domain.app

2022-02-17 08:52:53

PID   ID                 CPU(%)  MEMORY(%)  MEMORY(KB)
----  -----------------  ------  ---------  ----------
2336  com.domain.app     0.34    8.01       76060

======================================================================
Commands
The following table lists the commands you can use.
| Commands | Description |
|---|---|
| ares | Provides the help menu for using the ares commands. |
| ares-config | Configures webOS CLI. |
| ares-generate | Creates a web app from a template. |
| ares-package | Creates and analyses an app package file. |
| ares-setup-device | Manages the target devices. |
| ares-install | Installs an app on the target device. |
| ares-launch | Runs or terminates the web app. |
| ares-inspect | Runs the Web Inspector for web app debugging. |
| ares-server | Runs the Web server for testing local app files. |
| ares-novacom | Gets a private key from webOS TV for the Developer Mode app. |
| ares-device | Retrieves a device’s system information and monitors the device’s resource usage. |
ares-config
Configures the webOS device profile to work with CLI.
Usages
ares-config
ares-config --profile|-p DEVICE_PROFILE
ares-config --profile-details|-c
ares-config --version|-V
ares-config --help|-h
Options
| Option | Parameter | Description |
|---|---|---|
| -p, --profile | DEVICE_PROFILE | Specifies a device profile to configure for CLI. |
| -c, --profile-details | None | Prints the currently-configured profile. |
| -h, --help | None | Prints help messages. |
| -V, --version | None | Prints the version of CLI. |
| -v | None | Prints verbose output. |
| --level | LEVEL | Sets the level of logs as LEVEL and prints the logs. |
Parameters
| Parameter | Description |
|---|---|
| DEVICE_PROFILE | The profile of a target device (tv is default) |
| LEVEL | A priority of logs (e.g., silly, verbose, info, warn, error) |
Examples
Here are some examples of different uses:
- Configure device profile for platform to tv (This is not necessary because
tvis default, except when you want to change the profile to back totvfromose).ares-config -p tv - Check the currently-configured profile
ares-config -c
ares-generate
Creates an app from a template. The ares-generatecommand with the --list option displays a list of available templates.
Usages
ares-generate [OPTION...] APP_DIR|SERVICE_DIR
ares-generate --list|-l
ares-generate --version
ares-generate --help|-h
Options
| Option | Parameter | Description |
|---|---|---|
| -t, --template | TEMPLATE | Uses the specified template. |
| -p, --property | PROPERTY | Saves the application information that is entered. |
| -s, --servicename | SERVICE_NAME | Specifies the JS service ID. |
| -f, --overwrite | None | Allows overwriting of existing files. |
| -l, --list | None | Lists all available templates. |
| -v | None | Displays the execution log. |
| -V, --version | None | Displays the version of the ares-generate command. |
| -h, --help | None | Displays the help of the ares-generate command |
Parameters
| Parameter | Description |
|---|---|
| APP_DIR | Specifies your app project directory. If the directory does not exist, the directory is created while this command is being executed. |
| SERVICE_DIR | Specifies your service directory. If the specified directory does not exist, the directory is created while this command is being executed. |
| PROPERTY | Specifies your app information. You should enter this parameter using JSON-type strings in the format of “Key=Value” or “{‘key1’:‘value1’, ‘key2’:‘value2’, …\}”. |
| TEMPLATE | Specifies a template to use in creating a project. |
| SERVICE_NAME | Specifies the JS service ID that you are creating. The service ID must be the sub-domain of the app ID to which the service belongs. |
Examples
Here are some examples of CLI usage:
- Check the list of templates
ares-generate -l basic Web App - (default) basic web app for webOS TV hosted_webapp Web App - hosted web app for webOS TV webappinfo Web App Info - appinfo.json for web app js_service JS Service - js service for webOS TV jsserviceinfo JS Service Info - services.json, package.json for JS service packageinfo Package Info - packageinfo.json for webOS package - Create a web app from the default template
ares-generate sampleApp ? app id com.example.sampleapp ? title Sample App ? version 0.0.1 Generating basic in C:\webOS_TV_SDK\CLI\sampleApp Success - Create a web app with a custom app ID in the
./sampleAppdirectoryares-generate -p "id=com.example.sampleapp" sampleApp Generating basic in C:\webOS_TV_SDK\CLI\sampleApp Success - Create a web app from the hosted web app template in the
./sampleAppdirectoryares-generate -t hosted_webapp sampleApp ? app id com.example.hostedapp ? title Hosted App ? version 0.0.1 ? url http://webostv.hostedapp.lge.com Generating hosted_webapp in C:\webOS_TV_SDK\CLI\sampleApp Success - Create a JS service with a custom service ID in the
./sampleServicedirectory. Note that the service ID must be the sub-domain of the app ID to which the service belongs.ares-generate -t js_service -s com.example.sampleapp.sampleservice sampleService - Create a web app in the
./sampleAppdirectory and set properties with JSON stringsares-generate -p "{'id':'com.example.sampleapp', 'version':'0.0.1', 'icon':'icon.png', 'type':'web', 'title':'Sample App', 'main':'index'}" sampleApp
ares-package
Packages your app and JS service into a package file (.ipk) stored in a specified directory. With the info orinfo-detail option, you can check the information about the package file.
The packaging process has two phases: minifying source code; and creating a package file. The ares-package command reduces the size of the source code by getting rid of as much redundant code as possible and merges it when creating a package file. The ares-package command adjusts and shrinks the variable names and line spacing and merges multiple files into a single file to reduce the code size and file load time.
An app file name must contain Latin letters only. If it contains non-ASCII characters, an error will occur.
Usages
ares-package [OPTION...] APP_DIR [[SERVICE_DIR][PKG_DIR][...]]
ares-package -i, --info PACKAGE_FILE
ares-package -I, --info-detail PACKAGE_FILE
ares-package --version
ares-package -help|-h
Options
| Option | Parameter | Description |
|---|---|---|
| -o, --outdir | OUT_DIR | Specifies a directory where the package file is created. |
| -c, --check | None | Checks whether your app’s appinfo.json file exists or not. This option does not make a package file. If the appinfo.jsonfile does not exist, warning messages appear. |
| -e, --app-exclude | EX_DIR | Lists the directories to exclude in the package file. |
| -n, --no-minify | None | Skips the process of minifying the source code. |
| -r, --rom | None | Proceeds up to the stage just before creating a package file phase. |
| -i, --info | PACKAGE_FILE | Specifies the file with the .ipk extension to be analyzed. |
| -I, --info-detail | PACKAGE_FILE | Specifies the file with the .ipk extension to be analyzed in detail. |
| -v | None | Displays the execution log. |
| -V, --version | None | Displays the version of the ares-package command. |
| -h, --help | None | Displays the help of ares-package command. |
Parameters
| Parameter | Description |
|---|---|
| APP_DIR | Specifies the directory of your app to be packaged. |
| SERVICE_DIR | Specifies the directory where JS service’s package.json file is located. |
| PKG_DIR | Specifies the directory where the packageinfo.json file exists. The file is a metadata file that contains information used by the packaging tool and the system. In general, you do not need to create the packageinfo.json file unless you include JS services into your app package. If there is no specified PKG_DIR, the ares-package command makes the packageinfo.jsonfile from the appinfo.json file. Note that if you use yourpackageinfo.json file, keep the data rule, such as ID naming conventions in the appinfo.json file. |
| OUT_DIR | Specifies the directory where the package file is to be created. If you do not enter the directory, the package file is created in the same directory as the command. |
| EX_DIR | Specifies the name of directories and files to exclude from your app when packaging the package file. You must enter the directories used for samples and tests. All subdirectories and files in the specified directory are excluded. Besides, specified files are excluded. This command finds directories and file recursively from the app directory that is matched. To exclude multiple directories, enter as “-e subdir -e filename”. You can also use a common pattern expression such as wildcard (*). |
| PACKAGE_FILE | Specifies the file with the .ipk extension to be analyzed. |
ares-package command recognizesSERVICE_DIR and PKG_DIR automatically by the configuration file. There is no order between theSERVICE_DIR and PKG_DIR.Examples
Here are some examples of different uses:
- Create a package file from the
./sampleAppdirectory and output it in the working directoryares-package sampleApp - Create a package file from the
./sampleAppdirectory and output it in./outputdirectoryares-package -o output sampleApp - Create a package file for debugging (without minifying)
ares-package --no-minify sampleApp - Create a package file except for
testCode1sub-directory,README.mdfile and all text files (.txt)ares-package -e "testCode1" -e "README.md" -e "*.txt" samplePrj - Create a package file with a external JS service directory
ares-package sampleApp sampleService - Analyze a package file
ares-package -i ./com.examples.app_1.0.0_all.ipk - Analyze a package file in detail
ares-package -I ./com.examples.app_1.0.0_all.ipk
ares-setup-device
Displays a list of registered target devices. You can also add, modify, or remove a device from the list. This command is mainly used to modify a target host address that is running on a remote host.
Usages
ares-setup-device
ares-setup-device [OPTIONS...] --add|-a [TARGET_NAME] [--info|-i [DEVICE_INFO]]
ares-setup-device [OPTIONS...] --modify|-m [TARGET_NAME] [--info|-i [DEVICE_INFO]]
ares-setup-device [OPTIONS...] --remove|-r [TARGET_NAME]
ares-setup-device [OPTIONS...] -f, --default [TARGET_NAME]
ares-setup-device --search|-s
ares-setup-device [--search|-s] --timeout|-t [TIMEOUT]
ares-setup-device --reset|-R
ares-setup-device --list|-l
ares-setup-device --listfull|-F
ares-setup-device --version|-V
ares-setup-device --help|-h
Options
| Option | Parameter | Description |
|---|---|---|
| -a, --add | TARGET_NAME | Adds a target device with the specified information. |
| -m, --modify | TARGET_NAME | Modifies a target device’s information. You can change the information of the target device except for its name. |
| -i, --info | DEVICE_INFO | Sets information for a target device. |
| -r, --remove | TARGET_NAME | Deletes a target device. |
| -f, --default | TARGET_NAME | Sets a target device as default. |
| -s, --search | None | Searches webOS devices in the same network with SSDP and displays the found device list. When you select a device from the device list, the IP address of the selected device is set for device information automatically. |
| -t, --timeout | TIMEOUT | Sets timeout value for the --search option.This option does not have to be preceded by the --search option. The default value is 5 (unit: second). |
| -R, --reset | None | Initializes the list of registered target devices. |
| -v | None | Displays the execution log. |
| -l, --list | None | Lists registered target devices. |
| -F, --listfull | None | Lists registered target devices’ information with more detail (JSON string). |
| --version | None | Displays the version of the ares-setup-device command. |
| -h, --help | None | Displays the help of the ares-setup-device command. |
Parameters
| Parameter | Description |
|---|---|
| DEVICE_INFO | Specifies the information of the target device. It can be entered using strings in the format of “Key=Value” or JSON-type such as ‘{“key1”:“value1”, “key2”:“value2”, …}’. You can use the following items as key for the target device:
|
| TARGET_NAME | Specifies the name of the target device. |
| TIMEOUT | Timeout for device searching (unit: second). |
The following example shows a DEVICE_INFO written in JSON format:
{'host':'10.123.45.67', 'port':'9922'}Examples
Here are some examples of CLI usages:
- List target devices
ares-setup-device --list - Add a target device (Target device name: myTV, Host address: 10.123.45.67, Port number: 9922 User: prisoner)
ares-setup-device --add myTV -i "host=10.123.45.67" -i "port=9922" -i "username=prisoner" - Add a target device with JSON format (Target device name: myTV, Host address: 10.123.45.67, Port number:9922 User: prisoner)
ares-setup-device --add myTV --info "{'host':'10.123.45.67', 'port':'9922', 'username':'prisoner'}" - Add a target device with interactive mode (Target device name: myTV, Host address: 10.123.45.67, Port number: 9922, User: prisoner)
ares-setup-device name deviceinfo connection Profile -------- ------------------------ ---------- ------- emulator developer@127.0.0.1:6622 ssh tv ** You can modify the device info in the above list, or add a new device. ? Select: add ? Enter Device Name: myTV ? Enter Device IP address: 10.123.45.67 ? Enter Device Port: 9922 ? Enter ssh user: prisoner ? Enter description: sample ? Set default? Yes ? Save? Yes name deviceinfo connection profile -------------- --------------------------- ---------- ------- myTV (default) prisoner@10.123.45.67:9922 ssh tv emulator developer@127.0.0.1:6622 ssh tvNoteIf you want to input the default value or set it empty, press the enter key without any value. - Modify a target device (Target device name: myTV, host address: 10.123.12.12)
ares-setup-device --modify myTV -i "host=10.123.12.12" - Modify a target device with interactive mode (Target device name: myTV, host address: 10.123.12.12)
ares-setup-device name deviceinfo connection profile -------------- --------------------------- ---------- ------- myTV (default) prisoner@10.123.45.67:9922 ssh tv emulator developer@127.0.0.1:6622 ssh tv ** You can modify the device info in the above list, or add a new device. ? Select: modify ? Enter Device Name: myTV ? Enter Device IP address: 10.123.12.12 ? Enter Device Port: 9922 ? Enter ssh user: prisoner ? Enter description: sample ? Save? Yes name deviceinfo connection profile -------------- --------------------------- ---------- ------- myTV (default) prisoner@10.123.12.12:9922 ssh tv emulator developer@127.0.0.1:6622 ssh tv Success to modify a device!!NoteIf you want to keep the previous value, press Enter without any value. - Remove a target device (Target device name: myTV)
ares-setup-device --remove myTV - Search for webOS devices
ares-setup-device --search - Set a device as the default device (Target device name: myTV)
ares-setup-device -f myTV
ares-install
Installs your app for a specified app package file (.ipk) on a target device. You can also see the list of apps installed on the target device or remove them using this command.
Usages
ares-install [OPTION...] PKG_FILE
ares-install [OPTION...] --remove APP_ID
ares-install [OPTION...] --list|-l [--type|-t APPLICATION_TYPE]
ares-install [OPTION...] --listfull|-F [--type|-t APPLICATION_TYPE]
ares-install --device-list|-D
ares-install --version|-V
ares-install --help|-h
Options
| Option | Parameter | Description |
|---|---|---|
| -d, --device | TARGET_DEVICE | Specifies a target device on which your app should be installed. |
| -l, --list | [-t, --type option] | Lists the installed apps on a specified target device. Use this option in conjunction with -d, --device option. |
| -F, --listfull | [-t, --type option] | Lists installed apps with more detail. Use this option in conjunction with -d, --device option. |
| -t, --type | APPLICATION_TYPE | Filters corresponding app type from the list of installed apps. Use this option in conjunction with -l, --listoption or -F, --listfull option. |
| --device-list | None | Lists all the available target devices. |
| -v | None | Displays the execution log. |
| --version | None | Displays the version of the ares-install command. |
| -h, --help | None | Displays the help of the ares-install command. |
storage-list and storage options have been deprecated since the CLI v1.12.0.Parameters
| Parameter | Description |
|---|---|
| PKG_FILE | Specifies the path of your app package file. |
| APP_ID | ID of an app to remove from the device. |
| TARGET_DEVICE | Specifies a target device for installing or removing an app or viewing the list of installed apps. |
| APPLICATION_TYPE | Specifies the app type for filtering the installed app list. The supported app type is:
|
Examples
Here are some examples of CLI usages:
- List available target devices
ares-install --device-list - Install the app of which the package name is
com.example.sampleapp_0.0.1_all.ipkon the TV device (Device name: myTV)ares-install --device myTV com.example.sampleapp_0.0.1_all.ipk - List the apps that are installed on the TV device (Device name: myTV)
ares-install --device myTV --list - List the apps of which the app type is web
ares-install --device myTV --list --type web - Remove the app of which the app ID is
com.example.sampleappfrom the TV device (Device name: myTV)ares-install --device myTV --remove com.example.sampleapp
ares-launch
Launches or terminates an app installed on a target device. This command can also display the list of apps running on the target device.
Usages
ares-launch [OPTION...] APP_ID
ares-launch [OPTION...] --hosted|-H APP_DIR [--host-ip|-I HOST_IP]
ares-launch [OPTION...] --close|-c APP_ID
ares-launch [OPTION...] --running|-r
ares-launch [OPTION...] --simulator|-s WEBOS_TV_VERSION APP_DIR
ares-launch [OPTION...] --simulator|-s WEBOS_TV_VERSION --simulator-path|-sp SIMULATOR_PATH APP_DIR
ares-launch --device-list|-D
ares-launch --version|-V
ares-launch --help|-h
Options
| Option | Parameter | Description |
|---|---|---|
| -d, --device | TARGET_DEVICE | Specifies a target device where you install your app. |
| -H, --hosted | APP_DIR | Runs your app without installation. However, with this option, you cannot execute the app that includes JS services. For more information, see Debugging Web App. |
| -I, --host-ip | HOST_IP | Specifies the IP address of the host PC where webOS CLI is run. You must use this option with the --hosted option. The host IP for the --hostedoption is selected automatically by default. However, if the--hosted option does not work properly due to a network connection error, specify the host’s IP address with this option. |
| -c, --close | APP_ID | Terminates an app on the target device. |
| -r, --running | None | Lists the apps that are running on the target device. |
| -s, --simulator | WEBOS_TV_VERSION | Specifies the webOS TV version of the Simulator to be launched. For more information, see Test on the Simulator. |
| -sp, --simulator-path | SIMULATOR PATH | Specifies the path of the Simulator to be launched. |
| -p, --params | PARAMS | Launches an app with specified parameters. |
| --device-list | None | Lists all the available target devices. |
| -v | None | Displays the execution log. |
| --version | None | Displays the version of the ares-launch command. |
| -h, --help | None | Displays the help of the ares-launch command. |
Parameters
| Parameter | Description |
|---|---|
| APP_ID | Specify the app ID to run or terminate. |
| TARGET_DEVICE | Specifies the target device on which the app is installed. |
| WEBOS_TV_VERSION | Specifies the webOS TV version of the Simulator on which the app is tested. |
| SIMULATOR_PATH | Specifies the path of the Simulator on which the app is tested. |
| APP_DIR | Specifies the app’s working directory to be tested. |
| HOST_IP | Specifies the host’s IP address. |
| PARAMS | Specifies parameters which are used on app launching. You should enter parameters and values using JSON-type strings in the format ‘{“param1”:“value1”, “param2”:“value2 which is containing spaces”, …}’. |
Examples
Here are some examples of different usages:
- Run the app of which the app ID is
com.example.sampleappon the TV device (Device name: myTV)ares-launch --device myTV com.example.sampleapp - Run the app with the URL parameter on the TV device (Device name: myTV)
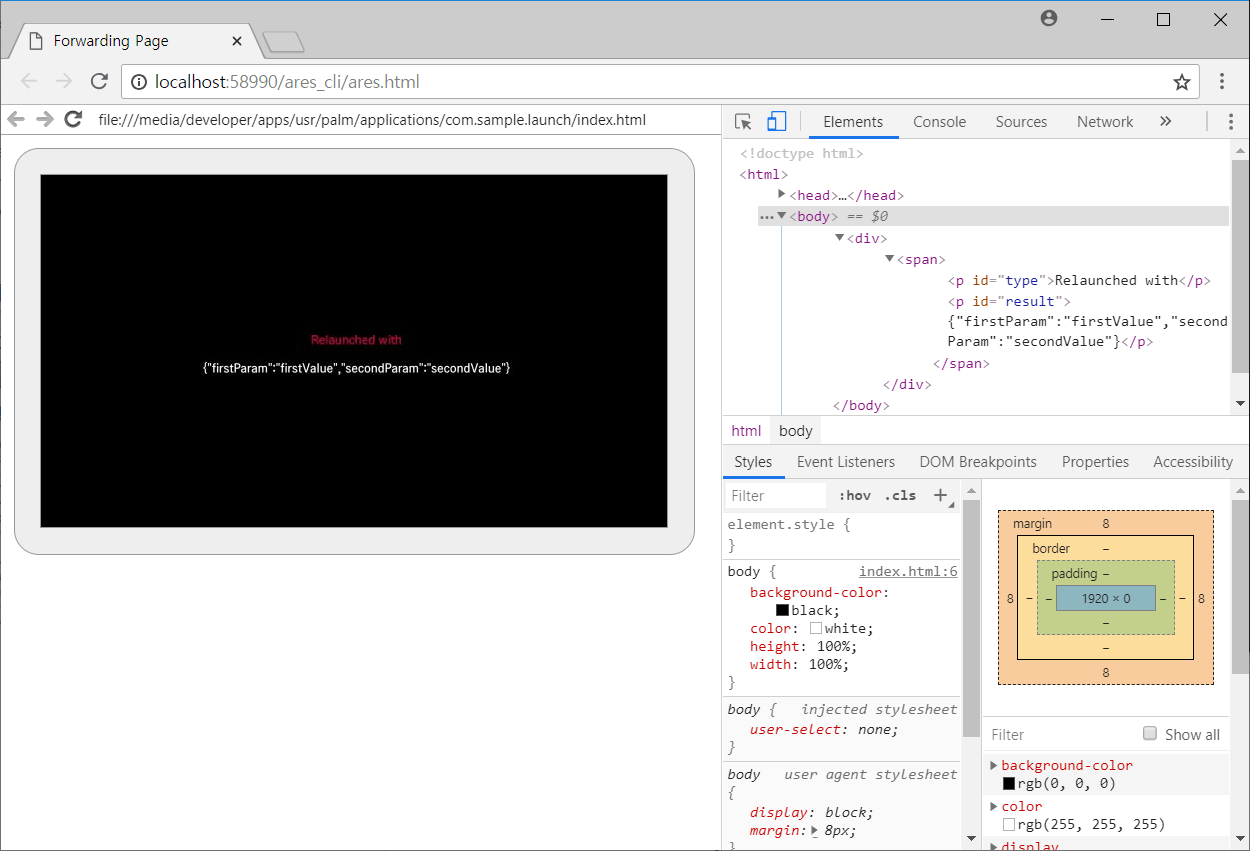
ares-launch --device myTV com.example.sampleapp --params "{'url':'www.lge.com'}"NoteWhen you use a parameter, the app receives the parameter with thewebOSLaunchevent. For more information about webOSLaunch event, see App Lifecycle. - List the apps that are running on the TV device (Device name: myTV)
ares-launch --device myTV --running - Terminate the app of which the app ID is
com.example.sampleappon the TV device (Device name: myTV)ares-launch --device myTV --close com.example.sampleapp - Run the app in the
sampleAppdirectory without installation on the TV device (Device name: myTV)ares-launch --device myTV--hosted sampleApp - Run the app in the
sampleAppdirectory without installation using the host IP address192.168.0.10on the TV device (Device name: myTV)ares-launch --device myTV --hosted sampleApp --host-ip 192.168.0.10 - Run the app in the
sampleAppdirectory on the webOS TV 24 Simulator in the specified pathares-launch -s 24 -sp /home/webOS_TV_24_Simulator_1.4.0 sampleApp - Run the app in the
sampleAppdirectory with two parameters on the webOS TV 24 Simulator in the specified pathares-launch -s 24 -sp /home/webOS_TV_24_Simulator_1.4.0 sampleApp -p "{'data1':'foo', 'data2':'bar'}"ares-launch -s 24 -sp /home/webOS_TV_24_Simulator_1.4.0 sampleApp -p "data1=foo" -p "data2=bar"
ares-inspect
Provides Web Inspector and Node Inspector.
Web Inspector and Node Inspector run on a web browser. Each inspector displays the running information about your web app or JS service.
Usages
ares-inspect [OPTION...] [--app|-a] APP_ID
ares-inspect [OPTION...] --service|-s SERVICE_ID
ares-inspect --version|-V
ares-inspect --help|-h
Options
| Option | Parameter | Description |
|---|---|---|
| -d,--device | TARGET_DEVICE | Specifies a target device where you install your app. |
| -a, --app | APP_ID | Specifies an app to run with Web Inspector. |
| -s, --service | SERVICE_ID | Specifies a JS service to run with Node Inspector. |
| -o, --open | None | Open the webOS TV SDK bundle browser (Chromium). |
| -v | None | Displays the execution log. |
| --version | None | Displays the version of the ares-inspect command. |
| -h, --help | None | Displays the help of the ares-inspect command. |
Parameters
| Parameter | Description |
|---|---|
| APP_ID | App ID of an app whose information is to be viewed using Web Inspector. |
| SERVICE_ID | ID of a JS service whose information is to be viewed using Node Inspector. |
| TARGET_DEVICE | Specifies a target device where you install your app. |
Examples
Here are some examples of different usages:
- Launch Web Inspector for the app of which the app ID is
com.example.sampleappares-inspect --device myTV --app com.example.sampleapp - Launch Node Inspector for the JS service of which the app ID is
com.example.sampleapp.sampleserviceares-inspect --device myTV --service com.example.sampleapp.sampleservice
ares-server
Runs a web server for testing local files.
The web server runs on the given path. You can terminate the web server with control-C (in Windows, Linux) or Command-C (in macOS).
Usages
ares-server [OPTION...] APP_DIR
ares-server --version|-V
ares-server --help|-h
Options
| Option | Parameter | Description |
|---|---|---|
| -o, --open | None | Open the webOS TV SDK bundle browser (Chromium). |
| -v | None | Displays the execution log. |
| --version | None | Displays the version of the ares-server command. |
| -h, --help | None | Displays the help of the ares-server command. |
Parameters
| Parameter | Description |
|---|---|
| APP_DIR | Specifies the directory of an app that you publish on the web server. |
Examples
Here are some examples of different usages:
- Run the web server in a source directory
ares-server ./source - Run the web server with the browser
ares-server ./source --open
ares-novacom
Gets a private key from webOS TV for the Developer Mode app.
After getting the private key, you can install and launch apps or run a command on webOS TV.
Usages
ares-novacom [OPTION...] --forward|-f [--port|-p DEVICE_PORT1[:HOST_PORT1]][--port|-p DEVICE_PORT2]][...]
ares-novacom [OPTION...] --getkey|-k
ares-novacom [OPTION...] --run|-r DEVICE_COMMAND
ares-novacom --device|-d
ares-novacom --device-list
ares-novacom --version|-V
ares-novacom --help|-h
Options
| Option | Parameter | Description |
|---|---|---|
| -d, --device | TARGET_DEVICE | Specifies the target device on which the command is executed. |
| -f, --forward | List of -p, -port options | Enables port forwarding between the host PC and the target device. You can specify a port number with additional option ( -p,--port option). |
| -p, --port | DEVICE_PORT[:HOST_PORT] | Specifies a port for port forwarding. |
| -k, --getkey | None | Gets the private key from webOS TV. Before using this option, you should run the Developer Mode app on your webOS TV. |
| -r, --run | DEVICE_COMMAND | Executes a command on the shell of the target device. |
| -D, --device-list | None | Lists available target devices. |
| -v | None | Displays the execution log. |
| --version | None | Displays the version of the ares-novacom command. |
| -h, --help | None | Displays the help of the ares-novacom command. |
Parameters
| Parameter | Description |
|---|---|
| DEVICE_PORT | Specifies the target device’s port number for port forwarding between the host PC and the target device. If only DEVICE_PORTis specified, the host PC uses the same port number for port forwarding. |
| HOST_PORT | Specifies the host PC’s port number for port forwarding between the host PC and the target device. |
| DEVICE_COMMAND | Specifies the command that runs on the shell of the target device. |
Examples
Here are some examples of different usages:
- Get the private key from webOS TV named
tv(Needed the Developer Mode app setting)ares-novacom --device tv --getkey - Set port forwarding between emulator (6622) and host PC (3030)
ares-novacom --device emulator --forward --port 6622:3030 - Run the
ps auxcommand on webOS TV namedtvares-novacom --device tv --run "ps aux"
ares-device
Retrieves the following system information of a device.
- Model name
- SDK version
- Firmware version
- Board type
- OTA (Over The Air) ID
Note that only retrieved information is shown if this command fails to retrieve some system information. With theresource-monitor option, you can monitor CPU (%) and memory (KB) usage of the target device or running apps and services.
Usages
ares-device
ares-device [OPTION...]
ares-device [OPTION...] --resource-monitor|-r
ares-device --device|-d
ares-device --device-list|-D
ares-device --version|-V
ares-device --help|-h
Options
| Option | Parameter | Description |
|---|---|---|
| -i, --system-info | TARGET_DEVICE | Displays the device system information. |
| -d, --device | TARGET_DEVICE | Specifies the target device on which the command is executed. |
| -r, --resource-monitor | None | Monitors resource usage of the target device. |
| -l, --list | None | Monitors resource usage of running apps and services. Use this option in conjunction with the --resource-monitor option. |
| -id, --id-filter | ID | Use this option in conjunction with the --resource-monitoroption. |
| -t, --time-interval | TIME_INTERVAL | Sets the monitoring interval in seconds. Use this option in conjunction with the --resource-monitor option. |
| -s, --save | CSV_FILE | Specifies the file name or path to save the resource usage data. Use this option in conjunction with the --resource-monitoroption. |
| --device-list | None | Lists all the available devices. |
| -v | None | Displays the execution log. |
| --version | None | Displays the version of the ares-device command. |
| -h, --help | None | Displays the help of the ares-device command. |
Parameters
| Parameter | Description |
|---|---|
| TARGET_DEVICE | Specifies the target device for retrieving information of a device. |
| ID | Specifies the ID of the app or service whose resource usage is displayed. |
| TIME_INTERVAL | Specifies the time interval for monitoring resource usage in seconds. |
| CSV_FILE | Specifies a file name or path to save the resource usage data. The file can be the .csv format only. |
Examples
Here are some examples of CLI usages:
- List available target devices
ares-device --device-list - Retrieve a device’s valid system information
ares-device -d DEVICE -i modelName: WEBOS4.0 sdkVersion: 04.00.00 firmwareVersion: 04.00.00 boardType: M16PP_ATSC_KR otaId: HE_DTV_W18H_AFADATAA - Display the resource usage
ares-device -d DEVICE -r - Display the resource usage periodically and saving the data into a CSV file
ares-device -d DEVICE -r -s resource.csv -t 1 - Display the resource usage by running apps and services
ares-device -d DEVICE -r -l - Display the resource usage by the specified running app every three seconds
ares-device -d DEVICE -r -id com.example.app -t 3